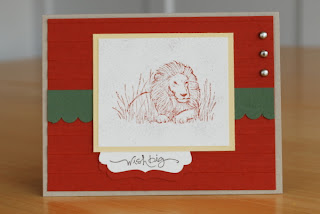
Hello again! Are you ready for another tip? I'm mixing this tip with another one of my favorite products.
Have you tried the Essentials Paper Piercing Pack (126187) yet? This tool was redesigned for the 2012-2013 Annual Catalog and has been joined by some new friends in the year since. These new friends are different versions with even more shapes that coordinated with Stampin' Up! dies and stamp images.
I started out with the older version that was similar to what you see on the bottom mat. The other two mats complete the essential set by giving you some basic shape and label options.
The Paper Piercing Tool (126189) is one you will want to keep in your stash nearby. Not only is it made to work with the paper piercing packs, but it is a help with many different types of projects. The tip is extremely sharp, so be careful!
Be sure to get the Stampin' Pierce Mat (126199) to use with the Stampin' Pierce Tool. It will protect your stamping surface from the sharp tip and give you something to pierce into behind your project. It is also a great surface to have under your project when you are stamping, to give even coverage. I wish I had my mat on hand at my last Stamp Camp. The long, plastic folding tables were giving us no end of grief with their slightly wavey surface. This would have solved our problem of an uneven stamped image perfectly!
Besides creating outline images to add texture and detail to your project, you can use the holes near the ruler end to make sure your brads are lined up. Simply sandwich the card stock between the mat and the piercing template and poke holes in every two or three spots, leaving room for the brads. No more marking with a pencil and hoping you punch in the right place! No more guesswork!
You can also give your project a stitched look by simply playing connect the dots with a white Gel Pen. No needle or thread necessary! Try it today and let me know what you think!


No comments:
Post a Comment