Thursday, October 31, 2013

Christmas Card Stamp Camp Sneak Peak #2

Card #2 was inspired by a card I also created last year using the Christmas Lodge stamp set. I then saw a card I loved on page 9 of the Holiday Catalog, so I put the two together and came up with this:


Supplies Used:

Stamp Set:
Christmas Lodge

Paper:
Island Indigo, Coastal Cabana and Whisper White card stock
Winter Frost Designer Series Paper Stack

Ink:
Smokey Slate
Island Indigo

Accessories:
Sponge
Corner Rounder
Hexagon Punch
Paper Trimmer

Wednesday, October 30, 2013

Christmas Card Stamp Camp Sneak Peak #1

I know you've been waiting! I have, too! I had the ideas for these cards figured out last week, but I had to place an order. At least one element on almost every card is something new! On some it might just be the paper we'll use. But, I also got some new "toys" to use too! Excited yet? I am! And, those toys aren't here yet for me to make the "final drafts" of most of the cards. Hopefully today or tomorrow that brown truck will leave a nice brown package at my front door and I'll get to work! 

So, for today, I'm going to start by sharing a card that I made last year. Well, I remade since I gave those cards away... last year! I made several of these cards to go along with the gifts the kids gave their teachers at Christmas. They are simple 3" x 3" cards that tuck nicely into small gifts. I decided to use this card design because it will allow us to use the new Envelop Punch Board to make envelopes to go along with the cards. How fun! If you come to Stamp Camp you can gift this cute little set of cards and envelopes to someone on your list or use them like I did, handing them out with gifts. Either way, I know the recipient will appreciate the time and detail even in this simple card.


Supplies Used:

Stamp Set:
Teeny Tiny Wishes

Paper:
Crumb Cake, Wild Wasabi and Garden Green card stock
Season of Style Designer Series Paper (DSP) - For the envelopes

Ink:
Chocolate Chip

Accessories:
Jewels Basic Rhinestones
Dimensionals
Envelope Punch Board

Tuesday, October 29, 2013

Terrific Tips Tuesday

Today's tip includes another handy tool: The Brayer. More than likely you have never heard of it. Next likely, you might even have one, but have never used it! I hear ya! But I don't want you missing out on all the things this wonderful, simple tool can do!


The easiest thing to do with the Brayer is what I use it for the most: making sure my adhesive sticks. Most adhesive and tape runners are actually fully activated when they have pressure and heat or warmth applied to them. The first way you can do that is by flipping your project over (card or scrapbook page) and rubbing your hand/palm over the back of the paper with pressure. But, try doing that over and over again when you are making your Christmas cards and your hand will not be happy. In comes the Brayer! Keep it handy and once you've completed your project, just roll the Brayer over everything to make sure every element stays where you placed it. 

The Brayer is also great for inking up and covering a large area. And that's just a jumping off point! Search "brayer techniques" and be prepared to spend some time checking out the flood of results you will get. The, get your Brayer, try something new and have fun! And be sure to share it with me!

Monday, October 28, 2013

Exciting AND Helpful!

The Perfect Holiday Solution
Here's why these card bases will help you and your customers relax and enjoy the season:

  1. You'll save work and time not having to cut and score cards-even if you're simply making a card or two.
  2. You'll be able to make multiples in no time.
  3. You'll save on prep time for your projects - big and small. 
Check them out today and let Stampin' Up! take one more thing off your plate during this busy holiday season!

Tuesday, October 22, 2013

Terrific Tips Tuesday

Have you ever had problems lining up your stamps exactly where you want them? Then this tip (via a video from Stampin' Up!) is just for you!

Click on the picture of the Stamp-a-majig below to see the helpful video.


Thursday, October 17, 2013

A little help for my Tuesday Tip!

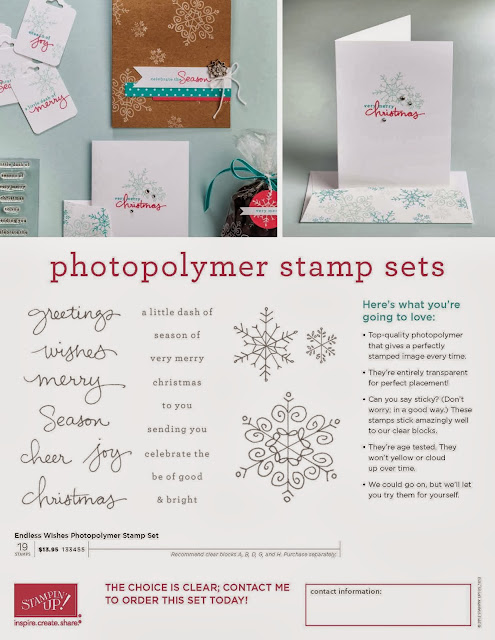
Stampin' Up! has a new photopolymer set out just in time to help you start planning your Christmas Cards! This one beautiful set is all you need to design many different cards, tags and other Christmas projects. Check it out today!

Tuesday, October 15, 2013

Terrific Tips Tuesday

Today's tip is inspired by my to-do list. Did you know that Christmas is just over two months away? Did you groan or did that bring a smile to your face? Either way, the time to start planning is now so you can actually enjoy the holidays this year. My tip? It's time to start planning your Christmas cards! I'll be doing that this week. My Christmas Card Stamp Camp is November 8th, and that day is rapidly approaching.

Here are some other ways I keep the stress level down when it comes to sending out those annual greetings:

  •  Keep a label document with the names and addresses of the people on your Christmas card list. It's easy to edit and when it comes time to address those envelopes all you have to do is print up the labels. Having this document saved is also helpful for other big events. When I had to send out birth announcements for each of our kids, I just printed up my Christmas card labels! It can also be a help when planning showers or birthdays.
  • Plan ahead. Don't just decide how you'll make your cards. Of course you need to decide if they'll be hand crafted with card stock or digitally designed. But, are you going to add a family picture? Will it just be tucked inside, or a part of the card? 
  • Speaking of pictures, have you had them taken yet? If not, today's the day to make that appointment! 
  • Set a due date. My goal is always to have the cards stuffed, labeled, stamped and ready to send by Thanksgiving. That way, after the turkey is done, I can sit back and enjoy the rest of the holidays! Or, get to work on the next project... Wrapping gifts, decorating, making it to all those school parties and programs, baking... The list is never-ending, but it can be less stressful!
Speaking of less stressful, Stampin' Up! has made navigating their on-line store less stressful! Visit today and check out the new features and stream-lined check-out process!

To leave you with a little inspiration, I thought I'd share some cards I've made for Christmases past:

These first two were made using Stampin' Up!'s digital software, My Digital Studio.


Tuesday, October 8, 2013

Weekly Deals!

Stampin' Up! has decided to celebrate its amazing customers with new "Weekly Deals" offerings. Starting today, you can find several items at a great discount. Don't miss out - these items will be on sale while supplies last. But, the even better news is, Stampin' Up! will bring you new weekly deals every week! So, check back often! Read HERE for more information and visit HERE to shop now!

Terrific Tips Tuesday

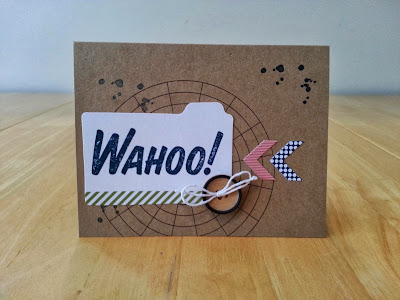
Today's tip is something I've shared before, but not as a tip. I am once again excited to share with you our most recent My Paper Pumpkin Projects. Some of my Stamp Club gals and I get together to make our kits. We have so much fun catching up with each other and creating these easy projects. Everything you need is included in the kit, but sometimes we have fun and change things up. You can see two versions of the bicycle card below. On the Wahoo card, I added some ink splatters courtesy of a stamp from a previous MPP kit. After searching Pinterest for some ideas, we also decided to change the card up slightly from the original template. Why not? If you don't think you have time to stamp or start a whole new hobby, this is for you. Each month a new project with all the supplies (except scissors and adhesive) will come magically to your door, ready to be transformed into beautiful cards and scrapbooks. Let Stampin' Up! be your paper crafting fairy godmother!

Friday, October 4, 2013

Holiday Help! Pop & Place tags to the rescue!


Stampin' Up! knows your time is valuable - especially during the busy holiday season! Stampin' Up! has just the kit to help make all your gifts and projects extra special - and extra easy! Introducing the new Pop & Cuts Holiday Tag and Stamp bundles. Two new products will help you with all your projects. First, I'm really excited for the Christmas Tagables Photopolymer Stamp Set:


You can also now get the Pop & Place Holiday Gift Tags Book which has 70+ tags in five designs created using Stampin' Up!'s popular punch and die shapes. If you've never used the punches and dies before, this is a great way to try out the different shapes and see which ones you love the most! Or, simply enjoy the options and the ease of the die cut tags on all your Christmas projects. One less thing to think about during the hectic season just around the corner!

You can buy these two items separately or bundle them and save money! Or, make it a gift and buy the bundle that also includes Clear Block C and the Soft Suede Classic Stampin' Spot!

Click HERE for more information.

ItemDescriptionPrice
134975Pop & Place Holiday Gift Tags Book$9.95
134623Christmas Tagables Photopolymer Stamp Set$13.95
135921Pop & Place Holiday Gift Tags Bundle includes
  • Pop & Place Holiday Gift Tags Book 
  • Christmas Tagables Photopolymer Stamp Set
$19.95
135290Pop & Place Holiday Gift Tags Starter Bundle includes
  • Pop & Place Holiday Gift Tags Book 
  • Christmas Tagables Photopolymer Stamp Set
  • Soft Suede Classic Stampin' Spot
  • Clear Block C 
$24.95

Best of 25 Years - October

Stampin' Up! released the October Best of 25 Years stamp set - and it is a beautiful set that will help you prepare for all your holiday projects and cards! Isn't it beautiful? Click HERE for more information.

Best of Christmas Clear Mount Stamp Set #134384 $14.95


Tuesday, October 1, 2013

Terrific Tips Tuesday

Today's tip is a pretty simple one, but I can always see the "light bulb moment" when I share it with people. It has to do with one of my very favorite tools, the Big Shot.

The tip begins like this: No two Big Shots are exactly the same.

So... That means that sometimes you have to play around a little to get the different dies to work the way you want them to. Sometimes that means you'll have to add a shim (or a an extra layer by adding a sheet of paper to your "sandwich") to get the die to cut just right.

But the biggest tip I share over and over again has more to do with the Multipurpose Platform that comes with the Big Shot and, generally, the embossing folders. The Platform has different "tabs" that create varying thicknesses that work with each different die, framelit or embossing folder. The platforms have suggestions on which tab to use for each accessory. My platform says that I should use Tab 1 for embossing folders. However, I have found that my "sandwich" is too tight and I have a hard time rolling it through and then my paper is almost cut instead of embossed. So I have learned to use no tabs with my embossing folder, just the main part of the platform. 

To sum up my tip, play around with your layers in your sandwiches that you run through your Big Shot. You may find that one works better than the other. But, most of all, have fun!