Tuesday, December 30, 2014

Terrific Tips Tuesday

I just have two simple tips today, mostly relating to punches. You know I love my Big Shot, but sometimes you have to make a project (or many of the same project) and you need a simple way to give it big impact. Here I was able to make many tags using 4 punches. I worked in an assembly line fashion and quickly had little treat bags ready to give to our Sunday School volunteers. Using DSP punched out with the circle punch added geometric pop behind the Christmas tree. You could always step this project up by adding rhinestones, glitter or Dazzling Details, but I think these simple tags stand very well on their own.
1 3/4" Circle Punch $16.95 #119850
1-3/4" Circle Punch
Tag Topper Scalloped Punch $22.95 #133324
Tag Topper Scalloped Punch
Tree Punch $16.95 #135859
Tree Punch by Stampin' Up!
Modern Label Punch $16.95 #119849
Modern Label Punch
I also altered the October My Paper Pumpkin kit into little tree gift boxes. I was able to use the tree punch to create a window. I trimmed a window sheet down to fit and adhered it using glue dots. I topped the tree off with a cute Champaign Glimmer Paper star. Again, easy, but big impact!

Friday, December 26, 2014

Flashback Friday (October Stamp Club Projects)

Here's a bit of a Flashback. I was looking up an older post and realized I never shared about our October Club projects!  I loved them and I can't believe I forgot!
1.       Cut out background using Lattice Trellis Die.
2.       Stamp sentiment and flag the end using the square punch or a pair of scissors.
3.       Punch 3 ovals using the oval punch. Sponge the edges using Soft Suede ink. Adhere two ovals with sides slightly overlapping. Adhere the third oval using a Dimensional.
4.       Cut out the leaf and vine using the Little Leaves Sizzlet Die. Trim to fit.
5.       Punch the Daffodil Delight card stock using the Boho Blossom Punch.
6.       Run the Chocolate Chip card stock through the Big Shot using the Lattice Embossing  Folder. Adhere to the flower and attach to the pumpkin.
7.       Stamp sentiment for inside of card on Whisper White card stock and adhere to inside of card.

1.       Using Lost Lagoon ink and Sponge Dauber, add polka dots to bag.
2.       Pick your favorite pattern of Designer Series Paper and cut it out using the Big Shot and the Chalk Talk Framelits.
3.       Stamp and punch out tag sentiment using Tangerine Tango ink and Artisan Label Punch. Adhere to tag using Dimensionals.
4.       Punch the butterfly out of Blushing Bride card stock using the Bitty Butterfly Punch. Add the sequin using a Glue Dot.
5.       Add button, bow and butterfly. Glue Dots may work best to adhere these items.
6.       Tie tag onto bag


Tuesday, December 23, 2014

Terrific Tips Tuesday

Just a quick tip today. It's that time of year. You'll remember this card from our November Stamp Club. I wanted to remind you how fun and easy it is to use these framelits to make sentiments - if you follow one simple tip: Place a piece of wax paper between the framelit and the paper. This will make it so much easier to pop the paper out of the framelit. The framelit is also designed with little holes in it. Use the Paper Piercing Tool to push through and pop out the paper. So fun!!

I used the Expressions Thinlits Dies which are retire. But, you can find the words, "joy" and, "noel" in the Wonderful Wreath Framelits Dies. #135851 $24.95
Keep your eye out for new framelits coming soon in the Occasions Catalog (pg. 31)!

Paper Piercing Tool #126189 $3.95


Friday, December 19, 2014

Flashback Friday

Today we're flashing back to a couple Stamp Club projects from November 2010. We made a tin and Christmas tags that made the perfect little hand-made gift. While some of these items are retired, I hope you find inspiration here for those last-minute gifts.

We had our monthly club meeting in late November. With the holidays and the craziness of life I am finally getting around to sharing our project. Usually we make 1 card and 1 3-D object. This month we decided to make Christmas tags so I changed things up a bit. I had some tins that I had purchased from Stampin' Up's on-line clearance rack a while ago. I saw a picture of a decorated tin and it looked like someone had embossed the tin. So, I did a litle experimenting and found out that with a heat tool and clear embossing powder you can get this amazing look! How neat! So, we decorated this tin to put...


...these tags inside. I used several different stamp sets, inks, punches and paper. Stampin' Up makes projects like this so easy since everything coordinates!

Christmas Tags

Tuesday, December 16, 2014

Terrific Tips Tuesday

Today's tip is one I just learned and I am so excited to share it with you. I read it HERE on Mary Fish's Stampin' Pretty blog, so I have to give her total credit for this, but it is too good not to share (just in case you don't already follow her amazing blog).

You can check her blog out yourself; she even shared a helpful video. The tip she shares is a better way to store your photopolymer stamps. I have to be honest, I did not love the photopolymer stamps when Stampin' Up! first came out with them. There were various reasons, but one of my biggest complaints was trying to keep them in between the two plastic storage sheets they come in. Well, Mary's tip shows you how to put the sheet with the stamps' images printed on it in between the the case and the plastic that holds the front label. Simply stick it in using a glue dot in each corner, with the images facing out the back.

The stamps now easily stick to the plastic of the stamp case and since they are a reversed image, they will align with the image on the sheet you just adhered.
And, when you flip the case over, the images are the right direction - perfect for seeing the set inside!
I just have one more thing to add to this tip. It is the perfect help if you have a My Paper Pumpkin subscription. Each month you receive a photopolymer stamp set with your kit, and if you're like me, you have a whole bunch of nice little stamp sets. But, what to do with them? Well, now you can organize them (I put mine in different cases depending by images versus sentiments), store them and easily find them by using this tip.

Mini Glue Dots $4.95 #103683

Clear Mount Stamp Cases $5.95 #119105

Festival of Trees Photopolymer Stamp Set
$15.95 #135059

Friday, December 12, 2014

Flashback Friday

I loved this card so much when we made it at a Stamp Camp several years ago. I stumbled on the picture of it and I think I love it just as much. While some of the items we used originally are retired, I hope you find inspiration to create some equally (or more so) beautiful! We used Stampin' Write markers to color the stamp in order to get the two-toned effect of the flowers.

This first card is beautiful, I believe, for it's simplicity. The sample shows a "Thank-you" card, but the Just Believe stamp set also has the sentiments, "just for you" and "friends", so this is also a very versatile card.

 
Supplies:

Stamp Sets:
Just Believe

Paper:
Baja Breeze, Whisper White, Cajun Craze, Old Olive

Inks:
Cajun Craze
Old Olive and Riding Hood Red Stampin' Write Markers

Accessories:
Scallop Trim Border Punch

Tuesday, December 9, 2014

Terrific Tips Tuesday


This is such a fun tip! Go HERE now and check out Stampin' Up!'s year-end closeouts! Through January 5th, these items are reduced up to 80% off. Items are only available while supplies last, so don't wait! And, even better? You'll also find Christmas items on sale, too! Merry Christmas to YOU!

Friday, December 5, 2014

November Stamp Club Projects

It's not a flashback Friday, but I am going back a couple weeks to our November Club projects. With Thanksgiving and having family in, it's been a little busy around here, but I didn't want you to miss out on these cute projects!

This first project is an ornament card inspired by this card that I found on Pinterest.

Ornament Card
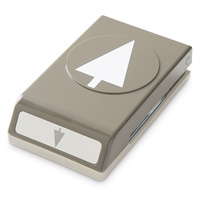
1.       To make the ornament, punch the card stock out with each smaller size using a lighter shade of card stock. The colors I used were: Cherry Cobbler, Real Red, Strawberry Slush and Blushing Bride. Adhere together as shown in the example.
2.       Punch the top and slightly below the top of the Ornament Punch out with the Champagne Glimmer Paper. Adhere to top of ornament ball using Tombow Liquid Adhesive.
3.       Adhere Gold Baker’s Twin to the back of the ornament. Adhere the ornament to the Crumb Cake card stock. Wrap twin around the top and back of the Crumb Cake card stock and adhere to the back. Adhere the Crumb Cake card stock to the Early Espresso card base.
4.       To cut out the Merry sentiment, layer it like you normally would with a framelit die (on top of the magnetic platform, in between two cutting pads), but put a piece of wax paper between the die and the Gold Foil Sheet. This will allow you to remove the sheet more easily from the die.
5.       Use a paper clip or paper piercer to pop out the sentiment and gently remove it from the die. Put the word through the Xyron sticker maker and adhere to card front.
6.       Add a sentiment to the Very Vanilla card stock and adhere inside card.

Snow Globe Ornament
1.       Use 1 ¾” Circle Punch to punch a hole in the middle of the Cherry Cobbler card stock.
2.       Use 2 3/8” Scallop Circle Punch to punch Cherry Cobbler card stock (lining up the circle you have already punched out in the center), Window Sheet and the Silver Glimmer Paper.
3.       Use the VersaMark pen to ink the snowman stamp, leaving out the, “To” and “From.” Shake the Pool Party Embossing Powder over the image and set with the Heat Tool.
4.       Punch out the snowman using the 1 ¾” Circle Punch.
5.       Lay the Glimmer Paper upside-down so the glimmer will become the back of your ornament.
6.       Using a tiny bit of adhesive to hold the ribbon in place, center it where you want it, at the top.
7.       Adhere snowman image.
8.       Remove the largest ring of the Shaker Frame from the backing sheet. To prevent the flakes from sticking to the top of the Shaker Frame, leave the top adhesive liner in place.
9.       Place the frame around the snowman image.
10.   Add a tiny pinch of Mica Flakes. If you add too much, it won’t have room to move around.
11.   Remove the top adhesive line from the Shaker Frame and adhere the Window sheet to the top.
12.   Using Tombow Liquid Adhesive, adhere the Cherry Cobbler Scallop Circle on top of the Window Sheet.

Tuesday, December 2, 2014

Terrific Tips Tuesday

First off, just a little reminder about Stampin' Up!'s Online Extravaganza! Don't miss out on some crazy good deals!


The next tip is a storage tip. I've seen other people do similar things, and I was so happy when I realized this would work in my craft room. I simply hung a magnetic knife holder on the wall and instantly had easier access to my scissors and other tools I use regularly. It is also a great way to either store your framelits or hold the set(s) you use the most or are using for a current project. 

How fun!

Here is a wider view of my work space. It's a little messy; I have a couple projects going on, plus I'm working on some other reorganization. Now that I've been here almost a year, I am finally figuring out a good flow for my work space. I wanted to see how I would like the knife holder before I bought two, but I will be buying another one for the right side of this space also. Asymmetry drives me a little nutty. ;)

Friday, November 28, 2014

Flashback Friday

Here is a fun card from a couple years ago:

Time to peak at another fun card! I had heard about the "stained glass" technique and had been hoping to give it a try for a while. At first I was going to do it for a Club project, but once I tried it I realized it was pretty simple and we could try it at a Stamp Camp!

Basically, you heat emboss with Black embossing  powder any lined image onto Vellum Card Stock. Then you flip it over and color in the images with Stampin' Write Markers. This technique gives a lot of bang for the buck - and your time! I used the butterflies from Kindness Matters for this card, but it would be absolutely beautiful with a bigger floral image. And, it's one of those projects that you just can't help but reach out and touch. 

Stamp Set:
Kindness Matters

Paper:
So Saffron
Tempting Turquoise
Whisper White
Vellum Paper
(the Vellum Paper retired but you can still get Vellum Card Stock.
It would be thicker and easier to work with than the paper anyhow)

Inks:
Tangerine Tango

Stampin' Write Markers:
Tangerine Tango
Tempting Turquoise
So Saffron

Accessories:
Corner Rounder Punch
Black Embossing Powder & Heat Tool
Big Shot
Framelits Labels Collection Dies

Monday, November 24, 2014

Terrific Tips Tuesday - A Day Early!

I just had to share this with you a day early! Today starts Stampin' Up!'s week long Online Extravaganza!


Check out the deals HERE.

Shop my online store HERE.

Check out the details below:

Make the most of our Online Extravaganza by enjoying flash deals on select items and bundles at a 20%-50% discount! But quantities are limited, and this great opportunity only lasts from November 24 through December 2, so get yours before they're gone. 
Plus, there will be limited-time door busters on November 24 and December 1 on special products-some that have never before been paired together-that are only available for 24 hours and while supplies last! These specific deals are extremely limited, so act fast!
Additional Details: 
  • Limited discounts available. Once discounts run out, items will be available at retail price.
  • Bundles are while supplies last only.
  • Discounted items/bundles available on all order types (customer, demonstrator, workshop, and online ). 
  • There is no minimum purchase in order to purchase the discounted product. 
  • You must use the bundle item codes provided.  Discounts will not be applied if individual component item numbers are entered separately. 
  • Additional products from current catalogs  may be purchased on the same order. 
  • Discounts range from 20%-50%.  
  • Door busters only last for 24 hours and while supplies last. 
    • First one begins at 12:00 AM (MT)  on November 24, running through 11:59 PM (MT) that same day.
    • The second begins at 12:00 AM (MT) on December 2, running through 11:59 PM (MT) that same day.

Friday, November 21, 2014

Flashback Friday

Today's flashback card definitely falls in my, "favorites" category. We made it at a February Stamp Camp. This card would make a great Valentine's Day card. It would also work great as a wedding, anniversary or even birthday card. And since it doesn't scream, "love, hearts, pink!", so you could really use this card for many occasions. 

Stamp Sets:
Elements of Style
Paper:
Basic Black
Very Vanilla
Real Red
Newsprint DSP
Inks:
Basic Black
Accessories:
Real Red Satin Ribbon
Big Shot & Lattice Embossing Folder

Tuesday, November 18, 2014

Terrific Tips Tuesday

I recently threw this card together for a friend's birthday. I used Blender Pens and an ink pad to color in the flowers on the image from the Apothecary Art stamp set. It's a beautiful, simple technique.

To get the right amount of ink on the Blender Pen, squeeze an ink pad before you open it. Ink will stick to the lid inside and when you open it, you can use it like a pallet. 

When you are done, pull the Blender Pen across scrap paper in a zig-zag pattern until no ink comes off on the paper. As long as it leaves a clear line, even if the tip has color to it, your Blender Pen is clean. Try it today!

Apothecary Art Stamp Set
CM #125527 $27.95
WM #128415 $34.95

Blender Pen
#102845 $9.95

Tuesday, November 11, 2014

Christmas Card Stamp Camp Sneak Peak #4

I just fell in love with this card, too. I love the texture of the Woodgrain Embossing Folder. I think this could also make a great birthday card. One of my favorite thing about this Stamp Camp is that these Christmas cards don't overwhelm you with the traditional greens and reds but you still get the strong sense that Christmas is in the air.

Supplies Used:

Stamp Sets:
Lovely As A Tree
Wishing You

Paper:
Bermuda Bay
Smokey Slate
Pool Party
Whisper White

Ink:
Smokey Slate

Accessories:
1 3/4" Scallop Circle
Decorative Label Punch
Scallop Edge Border Punch
Scalloped Tag Topper Punch
Silver 1/8" Ribbon (not pictured; waiting on order)
Dimensionals
Big Shot & Woodgrain Embossing Folder

Monday, November 10, 2014

Christmas Card Stamp Camp Sneak Peak #3

This card reminds me of a gingerbread cookie. Yum! You can almost smell the cinnamon and see the twinkle of the lights on the tree!

Supplies Used:

Stamp Sets:
Northern Hearts
Sassy Salutations

Paper:
Baked Brown Sugar
Old Olive
Cherry Cobbler
Season of Style DSP Pack

Ink:
Chocolate Chip
Whisper White Craft

Accessories:
Lace Paper Doilies
1 1/4" Scallop Circle Punch
Glitter
Cherry Cobbler Seam Binding Ribbon
Artisan Label Punch

Sunday, November 9, 2014

Christmas Card Stamp Camp Sneak Peak #2

I think this is my favorite card of the bunch. Christmas really is all about the Newborn King, my king, Jesus Christ. The thought that a tiny baby came to rescue us all - you can't make this stuff up! If you did, it wouldn't be like this! But God's ways are higher than ours and so we put all our trust in that beautiful baby. Glory, indeed!

This picture is actually a "mock-up" of the actual card. Where you see Glimmer Paper, we're going to use Gold Foil Sheets and we'll also use Gold Encore Ink for the manger scene. I had to order them and they just came in, but I wanted you to get a chance to see the card and not have to wait on me any longer. It's hard to tell in this picture, but the star and sentiment are heat embossed with Gold Embossing Powder. 

Supplies Used:

Stamp Set
The Newborn King

Paper:
Pear Pizzazz
Very Vanilla
Gold Foil Sheets
Blackberry Bliss

Ink:
VersaMark
Gold Encore

Accessories:
Gold Buttons (also not pictured; will replace Antique Brad)
Banner Punch
Glue Dots
Gold Embossing Powder & Heat Tool
Corner Rounder Punch

Saturday, November 8, 2014

Christmas Card Stamp Camp Sneak Peak #1

I am so excited to share this card with you! It's it beautiful?! I love it as a non-traditional Christmas card, but wouldn't this also make a great birthday card? 

Supplies Used:

Stamp Set:
Four the Holidays

Paper:
Silver Glimmer Paper
Back to Black DSP
Coastal Cabana
Crumb Cake
Strawberry Slush

Ink:
Silver Encore Stamp Pad

Accessories:
White Gel Pen
Dimensionals
Glue Dots
Big Shot & Stars Framelits
Mini Star Punch (retired)

Friday, November 7, 2014

Flashback Friday

Here's another Christmas card from Stamp Camp past. I still love the simple beauty of the card. I hope you do, too!

The next card is simple but turned out beautifully. I "CASED" this from another demonstrator. You can see her version of the card here. CASE stands for "copy and share everything". You will see subtle differences in our cards. People often ask me where I get ideas for cards. The answer is: Everywhere. Sometimes it starts from a color combination I see somewhere, sometimes the stamp set itself inspires me. And often I see a card someone else has made and I try to recreate it with my own spin. To be honest, I love it when I see what the ladies at my Stamp Camps come up with as variations to my cards. Our Creator created very creative people and I love that!
Products Used:
Stamps:
Four the Holidays, Northern Hearts
Paper:
Cherry Cobbler, Sahara Sand, Whisper White
Ink:
Sahara Sand
Accessories:
Big Shot & Framed Tulip Embossing Folder, Dotted Scallop Ribbon Border Punch, Basic Rhinestones

Tuesday, November 4, 2014

Terrific Tips Tuesday

Today's tip is short and sweet. I love those! 
(Although, I sort of feel like I'm cheating today. But I'd be cheating YOU if I didn't tell you about this!)

Did you know Stampin' Up! has a blog? Well, it does. You can check it out HERE. Stay up to day on new announcements and find tons of ideas for great projects!

Friday, October 31, 2014

Flashback Friday

I spent the last week putting the final touches on the cards for my Christmas Card Stamp Camp. In the spirit of the upcoming season (am I the only one who would be happy skipping Halloween?), I thought I'd share another past Christmas card:

This card is just plain cute! Check out the Stylin' Snowfolk stamp set (W 126285 $30.95, C126287 $22.95 - retired- sorry!) and all the options you have. You can accessorize your snowman (or snow-woman!) almost any way you can imagine!


Stamp Sets:
Stylin' Snowfolk, Border Banter
Paper:
Bashful Blue, Gumball Green, Whisper White
Inks:
Bashful Blue, Gumball Green, Soft Suede, Pumpkin Pie, Basic Black
Accessories:
Dimensionals, Scallop Border Punch

Tuesday, October 28, 2014

Terrific Tips Tuesday

Today's tip is a quick one, but hopefully a helpful one this week. Do you like my pumpkin? It was so simple to make! Those are simply 3 ovals punched out (using the Large Oval Punch and Tangerine Tango card stock) glued to my project. First I sponged the edges, then I adhered the two ovals on the sides just slightly overlapping. A Dimensional perfectly popped up the middle oval to give the pumpkin some depth and voila! A pumpkin! I added a leave and vine with the Little Leaves Sizzlet (retired), but you can easily cut these out yourself. The flower was made using the Owl Builder Punch and the Boho Blossoms Punch. I gave the center texture by using the Lattice Embossing Folder (retired).
By the way, this is also a sneak peak at one of our Stamp Club projects this Thursday!

Friday, October 24, 2014

Flashback Friday

I am starting to plan the cards we will make at the Christmas Card Stamp Camp next month. In honor of that, I thought I'd share a card we made at Stamp Camp a couple years ago:

I had so much fun creating this final card for Stamp Camp. It's very simple but the details make it. The key to this card: Punches. The card centers around the 2 1/2" circle punch right in the bottom middle of the Riding Hood Red card stock. All I did was center the punch at the bottom of the card stock and punch it out. Then the 2 3/8" Scallop Circle, 3/4" Circle and Ornament punches layer nicely on top. Using Pewter embossing powder for the Tidings of Comfort and Joy sentiment at the top along with the Simply Scorin' Tool add texture.

 
Stamp Sets:
Delightful Decorations, Word Play
Paper:
Crumb Cake, Riding Hood Red, Wild Wasabi, Whisper White
Ink:
Wild Wasabi, Riding Hood Red, VersaMark
Accessories:
Heat Tool and Pewter Embossing Powder, 2 3/8" Scallop Circle punch, 2 1/2" Circle punch, 3/4" Circle punch, Ornament punch, Dimensionals, Scorin' Tool

Tuesday, October 21, 2014

Terrific Tips Tuesday

How often do you need a card and you realize you don't have the right one for the occasion? I've learned a few tricks along the way to help myself out of this situation. First of all, I like to make larger quantities of cards like the Hello card below. This card would work great as a birthday, thank-you or thinking of you card.

The next time-saver is making card inserts ahead of time. These are 4" x 5 1/4" pieces of card stock with various sentiments on them. Then when you realize you have a birthday coming up you can grab your all-occasion card, stick in an insert with a birthday wish on it, sign it and send it! Can it get more simple that?! And the added layer of the insert gives your card a nice, finished look. Inserts are great for cards with a dark card base. They make the sentiment inside easier to read. You can really add a personal touch by adding an extra stamp, like I did with the flower below, to make it even more special.


Friday, October 17, 2014

Flashback Friday

Today I wanted to share a fun Stamp Club project we made a couple years ago. The projects are a coordinating card and gift bag. I hope you enjoy!

We had our monthly club meeting last week and I finally have a minute to sit down and share it with you!

These projects were fun to make and also fun to look at, thanks in big part to the Summer Smooches line of products. As seen in a previous post, Summer Smooches is a sneak peak promotion of items that are only available in April but all but two will be returning in the new catalog this June. We used the fabric, designer series paper, Bright Blossoms stamp set and the fabric brads. The brads are only available this month.

Our 3-D project was a gift bag. I combined two ideas from fellow demonstrator and friend, Lisa Zellers. She created a card with fabric and paper flowers on the front using the Fun Flowers die. She also created a beautiful gift bag, very similar to the one below, using the Framelits Labels Collection dies with a sentiment inside. I added the flowers from the card to create our hybrid bag and where Lisa used the Sale-a-Bration paper and coordinating colors, I used the Summer Smooches.

I saw the idea for a flip-flop card from tinkerwithink.com. She has many great tips and tutorials. 
We used the diagonal scoring plate along with the Simply Scorin' Tool to create a coordinating envelope.
Here's a picture of the inside of the card. My pictures are not doing it justice. I would recommend watching a video here. Give it a try! 

Friday, October 10, 2014

Fun Little Project

I'm helping lead a Wednesday night Bible study at church right now. To get everyone remembering what we talked about the previous week, we've been asking a couple challenge questions and handing out yummy chocolate for the right answer. Of course, I couldn't just buy chocolate and hand it out; I had to make it pretty. Well, perfect timing with the September My Paper Pumpkin project! It was Halloween themed and since I don't do much for Halloween I used my own stamps and changed things up a little bit. I think the project still turned out adorable! Almost as good as the chocolate inside!!

Tuesday, October 7, 2014

Terrific Tips Tuesday

I shared before, HERE, about Stamin' Up!'s kits. I just love the kits and there's one now available that will help you with your Christmas cards! Well, you'll get to check out this kit while watching a video on a fun technique! First, the kit is the Watercolor Winter Simply Created Kit. You are going to love it! Just take a peek for yourself:
Watercolor Winter Simply Created Kit
#135869 $24.95

Now, just check out this video and you'll see how easy it is to watercolor with a few basic supplies from Stampin Up!:

Friday, October 3, 2014

Flashback Friday

With the September Stamp Camp over with I'm already thinking ahead to the Christmas Cards Stamp Camp in November. So, in honor of that I thought I'd share a Christmas card from Stamp Camp about 3 years ago. It was simple, but had big impact:

This card uses the Pennant parade stamp set along with the Petite Pennants punch to create a 3-D Christmas tree. How cool is that?! Also, don't miss the Snowflake Embossing Folder used on the Pool Party card stock. What a perfect backdrop for a Christmas tree! 
Stamp Sets:
Pennant Parade
Vintage Labels

Paper:
Pool Party
Wild Wasabi
Whisper White

Ink:
Wild Wasabi
Chocolate Chip
Daffodil Delight

Accessories:
Large Oval Punch
Word Window Punch
Petite Pennants Punch
Scallop Squares Die & Big Shot
Snowflake Embossing Folder
Chocolate Chip Ribbon
Dimensionals

Tuesday, September 30, 2014

Terrific Tips Tuesday

I had Stamp at my house over the weekend. Assembling this card with the Builder Owl Punch requires a delicate touch when putting together the eyes. Those tiny piece like to be the problem child of the card. The tape runner is a little clunky to work well on such small pieces. The best option was using the 2-Way Glue pen. I've mentioned it recently for it's other uses, but here it works great to put adhesive right where you need it - no matter how small the piece of paper you are working with is.
 
2-Way Glue Pen
$4.50 #100425

We also found it best to use Glue Dots to adhere the bow you see on the above card and the buttons we used on the card below. 


Glue Dots
$4.95 #103683

Try out some different adhesives - they each have a special job - and that is to make your work a lot easier!